RAT Grips Thermal Moldable Grip Systems review by Booligan
Discuss this review HERE

Introduction
Ordering/Company Info
Basic Information
First impressions/Packaging
Different Kits
Proper Use
Pros/Cons
Overall
Introduction:
A comfortable and effective grip is one of the most critical parts of your gun, as it helps you effectively shoot without discomfort and fatigue. Most players will buy an aftermarket grip that fits better than a stock one, but for obvious reasons, isn't designed for the individual shooter. RAT Grips has filled that need, offering several thermal moldable grips allowing the end user to actually mold their grip to their actual hand, giving you one of the most comfortable and ergonomic grips possible.
Ordering/Company Info:
I came across RAT (Rapid Adaptation Technology) Grips at SHOT Show 2010 in Las Vegas, and was really impressed with their product line. They had a booth where they were actually demonstrating the grip system, as well as the installation process, which really helped show how simple and effective this system is. The kits are designed for real guns, but are fully compatible with airsoft guns as well. They were kind enough to provide a sample of their various products to Airsoft Retreat for a first ever review on an airsoft website! Their products are available on their WEBSITE, with various packages costing different amounts. Today, we will be reviewing their SPRR Grip, Rat Pads, and Carbine Grip kits, which are priced from $19.99 - $59.99.
Basic Information:
The idea behind these grip kits is to use a thermal moldable polymer material to custom mold the grip surface of your gun to your hand. It does not replace the grip that is already on your gun, instead stacking on top of it with an additional grip surface. Think of it as making your own overmolded grips. The different products are adaptable to fit pretty much any gun out there, be it a pistol, rifle, carbine, shotgun, etc. I've even seen these installed on knives, hatchets, shovels, and pretty much anything else that you can put your hand on. This versatility is what really makes this product shine, as it allows you to have a custom ergonomic grip on any of your guns, regardless of how well supported they are by aftermarket companies.
First impressions/Packaging:
Each different model came packaged in their own plastic display packages, ready for display on retail shelves. The different kits include different accessories, and I'll cover them all in the next section.
Different Kits:
Today, I'll be reviewing three different products made by RAT Grips; the SPRR kit, Carbine Grip kit, and Rat Pads.
The SPRR Grip kit is their most basic kit, giving you two front strap units, allowing you to install a custom on two guns. It is priced at $19.95, and includes the two front grips, as well as a mesh texture cloth. This kit is good if you're comfortable with the general size and shape of your grip, but want to customize the front strap to fit your finger shape and angle.

Black SPRR Grip pad, kit includes 2
The Carbine Grip kit includes two SPRR front pads, and a large grip panel designed to wrap around your existing grip, giving you total coverage. This kit technically allows you to make custom grips for three separate guns, and is priced at $59.95, including a mesh texture cloth and texture glove.

Wraparound grip panel

Texture glove and fabric
Lastly, the Rat Pad kit includes two 5x5 untextured and unshaped sheets, allowing you to cut out the exact shape you want, and mold it to fit on damn near anything. It is priced at $49.95, and, like the Carbine kit, includes a glove and textured cloth.

Rat pad, kit includes 2
The different kits are available in many different colors, including black, khaki, dark khaki, brown, OD, and even a marbleized green camouflage finish. One of the nicest parts about these kits are that they are removable, and reusable, allowing you to remold the grips to fit whatever gun you want to use at the time. They can be removed without leaving any residue on your existing grip, are IR/UV neutral, and can even be painted after installation.
[img width=590 height=768]http://www.ratgrips.com/images/product-info.gif[/img]
Product info provided by RAT Grips
Proper Use:
Installing your chosen RAT Grip system is a relatively easy process, not even requiring the removal of the existing grip from your gun. The only tools needed are a heat gun, scissors, and a bowl of water. You are working with polymers at high temperatures here, so to avoid discomfort, RAT Grips recommends that you keep your hands wet while molding the grips. Detailed installation instructions can be found here: http://www.ratgrips.com/product-info.asp
For this demonstration, I will install an SPRR Grip on a standard M4 grip. You begin by wetting your heat resistant work area slightly, to keep the grip from sticking to the surface once heated. I then cut a little bit off of the bottom of the grip pad, as it looked like it would be a little bit too long for the M4 grip.

SPRR pad and M4 grip

Heat gun used during this review
I laid the SPRR pad face down on my work surface, and hit it with the heat gun until the pad got glossy and started to flex a bit. Working quickly but carefully, I picked up the pad and stuck it to the M4 grip, spreading it out on the edges to ensure it was solidly attached. Then, I hit the entire grip pad again with the heat gun, so that the whole surface was glossy and malleable. After wetting my hand, I grabbed the grip as though I was holding the gun, applying a bit of pressure to ensure that it properly molded to my hand.


Grip after initial molding
The grip was now ready for texturing. Once again, hit it with the heat gun until it's a bit glossy, and, using a wet textured cloth or glove, hold the grip again, as if you were holding the gun. You can then peel off the textured cloth, and you will notice that the pattern of the cloth remains on the grip pad.

Textured

Front view, notice how my hand shape makes the finger grooves crooked. No aftermarket grip can replicate this from the factory.
Overall, it takes a little bit of practice to get the process down perfect, but the fact that the products can be reheated and remolded pretty much forever means that you can do this again and again until you get it perfect.
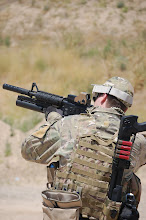
Here are additional pictures of RAT Grips installed onto a Hi-Capa, pictures courtesy of The Vainguard:


Pros:
Truly customizable for each user
Many options for different guns/users
Available in loads of colors
More affordable than buying tons of different grips
Reusable and remoldable
Cons:
Installation has a little bit of a learning curve
Looks a bit like you have Silly Putty stuck to your gun (only with the Khaki color shown above)
You must have a heat gun
Overall:
I was really impressed with these grip systems when I saw them at SHOT Show, and I'm still impressed with them now. It wasn't as easy to make my grip as they made it look at the show, but the learning process is pretty quick and the product allows you to keep trying until you get it perfect. I really like the fact that I can now mold custom ergo grips for any of my guns, including odd models like my Galil, Sigs, T89, pistols, etc. I think that this product has a good future in airsoft, and I think we'll all be seeing more RAT Grips on guns in field!
Many thanks again to RAT Grips and of course, Airsoft Retreat!